
Top
Adjusting Your Samsung Soundbar’s Treble & Bass Settings
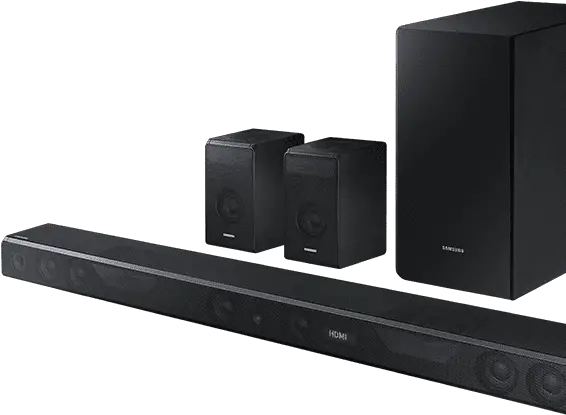
The Samsung soundbar comes with treble, bass, and other settings that are always changing. To make sense of all these settings you need to know the basics about each one. we’ll explain how some basic settings work so you can understand when certain settings are needed during different situations.
If you are also a Samsung Soundbar user, then you must know that there are lots of options available on the menu. But getting to know these options can be difficult sometimes. That’s why we came up with this guide which will help you get some useful information about bass, treble, and other settings for your sound bar.
Table of Contents
Understanding treble

The higher frequencies of sound in the audio spectrum are referred to as treble. It is responsible for the purity and sharpness of sound and contains features such as cymbal sounds in music, sibilant sounds in speech such as “s” and “t,” and other high-pitched noises.
Changing the treble on your Samsung soundbar may make a big difference in the overall sound quality. Increasing the treble may make the music brighter and more detailed, but setting it too high might make the audio unpleasant and tiring to listen to. Reduced treble, on the other hand, may make the sound less brilliant and detailed, but if set too low, it can make the audio seem dull and muddy.
It’s critical to establish the proper treble balance to get the optimum sound for your tastes. Experiment with various treble settings and pay attention to how the clarity and sharpness of the sound varies. It’s also worth noting that the optimal treble level may differ based on the sort of material you’re listening to, such as music or movies.
Treble adjustments on your Samsung soundbar may be accessed through the built-in equalizer or the soundbar’s menu. You may obtain a clean, detailed, and pleasurable sound by making the necessary changes.
Understanding bass

The lower sound frequencies that are found throughout the audio spectrum are referred to as bass. It is responsible for the depth and fullness of sound and contains components such as the rumbling of thunder, the sound of drums and bass guitar in music, and other low-pitched noises.
Modifying the settings for the bass on your Samsung soundbar may have a big effect on the sound quality as a whole. The music may become richer and more forceful when the bass is turned up higher; but, if the bass is turned up too high, the audio might sound boomy and overpowering.
Alternately, reducing the amount of bass may result in a sound that is less full and strong; nevertheless, if the bass is adjusted too low, it can cause the audio to sound thin and feeble.
It is essential to locate the ideal proportion of bass in order to realize the ideal sound that caters to your specific tastes. Try out a variety of various bass levels and pay attention to how the sound changes in terms of its depth and fullness as you do so.
It is also essential to keep in mind that the perfect bass setting may change based on the sort of media, like as music or movies, that you are playing on your device at the time.
Either via the equalization that is incorporated into your Samsung soundbar or through the menu on the soundbar itself, you may adjust the bass levels. You may generate a sound that is rich, robust, and delightful to listen to by making the appropriate modifications, as described above.
Additionally, if you have a subwoofer connected to your soundbar, you will need to alter the bass settings on both the soundbar and the subwoofer in order to obtain the proper balance of bass. This can be done by going into the “Settings” menus on both devices.
Finding the right balance
It is crucial, in order to get the best sound for your tastes with your Samsung soundbar, to find the proper balance between the treble and the bass. The perfect balance will change based not just on the kind of information you’re listening to but also on your own preferences and those of others around you.
A decent place to begin is by adjusting the treble and bass controls on the equalizer to a level that is in the middle of the scale, sometimes known as the 0 point. After reaching this point, you will be able to play with the treble and bass levels to observe how changing them will alter the sound.
When altering the treble, pay attention to how clear and sharp the sound is before making any changes. Reduce the amount of treble if it has a grating or wearing sound. You may need to turn up the treble if the sound is flat and murky.
Pay close attention to the depth and richness of the sound as you make adjustments to the bass. Reduce the amount of bass if it has a boomy or overbearing sound. If it seems lacking in depth and power, try turning up the bass.
It is essential to locate the treble and bass levels that, in conjunction with the material you are listening to, provide the optimal listening experience for you. You may also experiment with the many equalization settings that are perhaps included with your Samsung soundbar; nevertheless, it is important to make further modifications in order to reach the sound quality that is ideal for you.
It is also essential to keep in mind that the acoustics of the area you are in might have an effect on the sound produced by your Samsung soundbar. Because of this, you may find that you need to alter the treble and bass settings depending on the environment you are in.
In a nutshell, adjusting the treble and bass levels on your Samsung soundbar is a process of trial and error in order to get the optimal balance. Experiment with various options, pay attention to how those changes impact the sound, and modify as necessary until you find a combination of settings that produces the sound that suits your tastes the best.
Using the built-in EQ
You may modify the treble and bass levels as well as other frequency ranges using the built-in equalizer (EQ) on your Samsung soundbar to get the ideal sound for your tastes.
You must explore through the Samsung soundbar’s menu in order to find the EQ settings. Typically, the “Menu” button on the soundbar’s remote control is used to access the menu. Once there, search for and choose the “Settings” or “Audio” option. You ought to be able to access the EQ settings from there.
With sliders or knobs that you may use to alter the levels of various frequency ranges, the EQ settings probably include a visual representation of the frequency spectrum. The bass and treble frequency bands, as well as others like the mid-range and high-midrange, are often present.
To create the ideal sound for your tastes, you may change the levels of these various frequency bands. Remember that your own preferences and the sort of material you’re listening to will affect the appropriate EQ settings.
You may experiment with the default EQ settings on your Samsung soundbar to see how they work for you. To get the ideal sound for you, you may, however, also make further tweaks to the default EQ settings.
It’s important to remember that the EQ settings might vary depending on the input source. Therefore, you may have to change the EQ settings for other sources like Bluetooth, HDMI, or USB.
In conclusion, you can modify the treble and bass levels as well as other frequency ranges using the built-in EQ on your Samsung soundbar to get the ideal sound for your tastes. It’s crucial to try out various settings and modify the EQ in accordance with the source and material you’re listening to.
Conclusion
Finally, modifying the treble and bass settings on your Samsung soundbar may significantly enhance overall sound quality. Understanding the significance of treble and bass in the audio spectrum, as well as finding the proper balance of these frequencies, is critical to obtaining the optimal sound for your tastes.
You can fine-tune several frequency ranges, including treble and bass, using the built-in EQ on your Samsung soundbar to get the optimum sound for your tastes. Experiment with various settings and tailor the EQ to the source and material you’re listening to.
Remember that the optimal settings will differ based on the sort of material you’re listening to and your own preferences, so don’t be afraid to experiment with the settings until you discover the right sound for you.

A blog which focuses on business, Networth, Technology, Entrepreneurship, Self Improvement, Celebrities, Top Lists, Travelling, Health, and lifestyle. A source that provides you with each and every top piece of information about the world. We cover various different topics.

Top
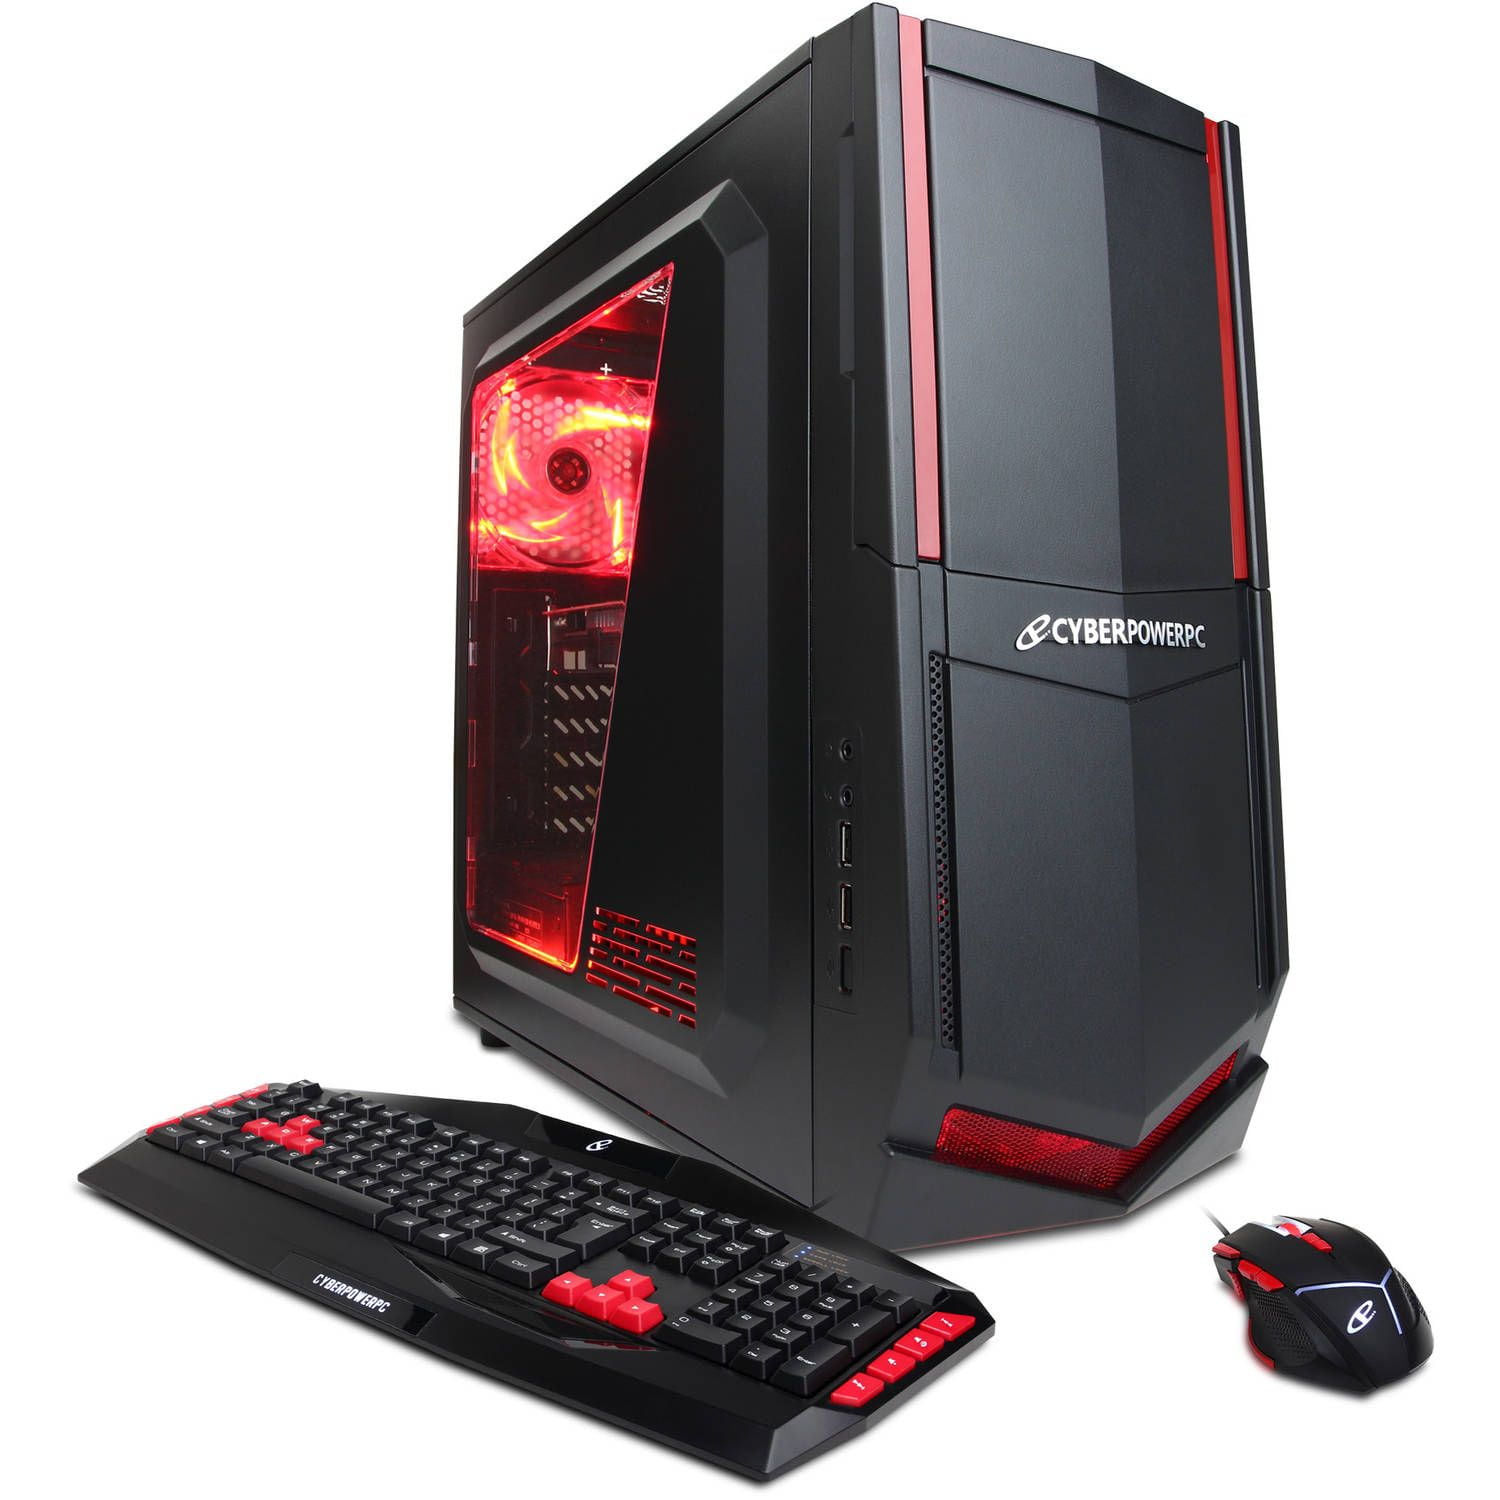
Level Up Your Gaming: Adjust CyberPowerPC Mouse DPI Settings Easily
Accuracy and precision are essential in gaming. DPI (dots per inch) enters the picture here. The term “DPI” stands for “dots per inch,” and it describes how sensitive a mouse is to movement. This indicates that you may move the pointer around the screen with fewer actual mouse movements when the DPI is greater.
The Tips on how to optimize the DPI settings on the CyberPowerPC mouse for a better gaming experience.
You may tailor your gaming experience and make it more pleasant for your particular requirements and tastes by modifying your DPI settings in addition to offering precision and accuracy.
Understanding and modifying your DPI settings may significantly improve your gaming, whether you’re a professional gamer wanting to get a competitive advantage or a casual player looking to enhance your experience.
Everything you need to know about the DPI settings on the CyberPowerPC mouse will be covered in this article, including how to adjust them, suggested values for various gaming genres, and how to test and fine-tune them for optimum performance.
We’ll also go through some typical DPI-related problems and how to fix them. You’ll have a better grasp of DPI’s operation and how to apply it to the CyberPowerPC mouse to enhance your gaming experience at the conclusion of this article.
Adjust CyberPowerPC Mouse DPI Settings Easily
Enhance your gaming precision with the CyberPowerPC mouse by adjusting its DPI settings. Customizing your mouse’s sensitivity allows for better control and accuracy in games, giving you a competitive edge. In this article, we will provide you with a simple step-by-step guide on how to adjust the DPI settings of your CyberPowerPC mouse, along with some helpful customization tips.

Key Takeaways:
- Adjusting the DPI settings of your CyberPowerPC mouse can improve accuracy and control in games.
- Understanding DPI and its impact on gaming performance is crucial for optimizing your mouse settings.
- A step-by-step guide will help you identify and adjust your current DPI settings for enhanced control.
- Recommended DPI settings for different game genres can further enhance your gaming experience.
- Troubleshooting common DPI adjustment issues ensures a smooth gaming experience.
Table of Contents
Understanding DPI and Its Impact on Gaming Performance
DPI, or dots per inch, is a crucial factor that directly influences your gaming performance. By understanding DPI and its impact on your mouse sensitivity, precision, and accuracy, you can optimize your gaming experience.
DPI refers to the measurement of sensitivity for your mouse. A higher DPI setting means that your cursor will move faster across the screen, allowing for quick reactions in fast-paced games. On the other hand, a lower DPI setting results in slower cursor movements, providing greater control and precision in slower and more strategic games.
Why is DPI so important for gamers? Well, the right DPI setting can significantly improve your gaming performance. A higher DPI enables you to swiftly navigate your mouse across the screen, providing smoother cursor movements and faster response times. This enhanced speed can be particularly advantageous in games that require quick reflexes and precise aiming.
On the other hand, a lower DPI setting offers greater accuracy and control. For tasks that demand precision, such as sniping or intricate maneuvering, a lower DPI allows for smoother and more controlled movements, ensuring your cursor lands precisely where you want it to.
It’s important to find the perfect balance in DPI settings that suits your gaming style and preferences. By adjusting your mouse’s DPI, you can achieve the ideal sensitivity for your gameplay, leading to improved accuracy and overall gaming performance.
CyberPowerPC Mouse DPI Settings: A Step-by-Step Guide
Before adjusting your DPI settings, it is important to know your current DPI value. This can be done by referring to the manual that came with your CyberPowerPC mouse or by performing an online search using the make and model of your mouse. Additionally, some mice have built-in software or buttons that allow you to check and change the DPI settings directly. This section will explain different methods to identify your current DPI settings.
Once you have identified your current DPI settings, you can proceed to adjust them to suit your gaming preferences. This section will provide instructions on how to change the DPI settings on your CyberPowerPC mouse using the buttons located on the mouse or through the software provided by CyberPowerPC. It will also highlight the importance of finding the right balance between speed and precision in order to achieve enhanced control in games.
Different genres of games may require different DPI settings to achieve optimal performance. This section will provide a list of recommended DPI settings for popular genres such as MOBA games, FPS/Shooter games, real-time strategy games, and MMO/RPG games. These recommendations will help you fine-tune your CyberPowerPC mouse to match the requirements of specific game genres, enhancing your gaming experience.
Troubleshooting Common DPI Adjustment Issues
Despite the ease of adjusting DPI settings, users may encounter some common issues while trying to optimize the DPI settings of their CyberPowerPC mouse. This section addresses these common problems and provides troubleshooting tips and solutions to fix them.
Problem: Unresponsive Buttons
If you are experiencing unresponsive buttons on your CyberPowerPC mouse after adjusting the DPI settings, here are a few troubleshooting steps you can try:
- Check the mouse cable for any damage or loose connections.
- Make sure the drivers for your mouse are up to date. You can visit the official CyberPowerPC website to download the latest drivers and software.
- Try connecting the mouse to a different USB port.
- Restart your computer and check if the issue persists.
If the problem still persists, it is recommended to contact CyberPowerPC customer support for further assistance.
Problem: Software Conflicts
Software conflicts can sometimes interfere with the proper functioning of your CyberPowerPC mouse after adjusting the DPI settings. Here are some troubleshooting steps to resolve software conflicts:
- Close any unnecessary programs running in the background that might be conflicting with the mouse software.
- Disable any third-party mouse software or overlay applications.
- Try running the mouse software as an administrator.
- If the issue persists, uninstall and reinstall the mouse software.
By following these troubleshooting steps, you can resolve common software conflicts that may arise after adjusting the DPI settings of your CyberPowerPC mouse.
Problem: Incorrect DPI Readings
If you are getting incorrect DPI readings or your mouse sensitivity does not match the selected DPI setting, try the following troubleshooting steps:
- Ensure that the DPI settings are properly configured in the mouse software. Double-check the values and make any necessary adjustments.
- Verify that your mouse firmware is up to date. Visit the CyberPowerPC website to download the latest firmware version for your mouse.
- Try resetting your mouse to its default settings and reconfigure the DPI settings.
- Test your mouse on a different computer to rule out any hardware issues.
If the issue persists, it is advisable to contact CyberPowerPC customer support for further assistance and guidance.
By following the troubleshooting steps outlined above, you can effectively resolve common DPI adjustment issues with your CyberPowerPC mouse and optimize your gaming experience.
Understanding the DPI settings on the CyberPowerPC mouse
A built-in DPI switch on the CyberPowerPC mouse makes it simple to modify the cursor’s sensitivity. The CyberPowerPC mouse’s default DPI level is normally 1600, but you may change it to a higher or lower setting based on your requirements. You may discover the ideal degree of sensitivity for your gaming requirements by adjusting the DPI setting in increments.
The DPI setting on the CyberPowerPC mouse will change when the DPI switch is pressed, and the LED lights on the mouse will show the new DPI value. For instance, the DPI is set to the lowest level if just the first LED light is on, and the maximum level is shown if all LED lights are on.
It’s crucial to be aware that several CyberPowerPC mouse models may have various DPI settings, with some having 5 levels and others having 6 or 8. This allows you to have finer control over the sensitivity of the pointer.
It’s vital to understand that changing the DPI level will change the cursor’s sensitivity to movement but not its speed. The polling rate of the mouse, or the pace at which the mouse provides data to the computer, controls how quickly the pointer moves.
The CyberPowerPC mouse normally polls at a rate of 1000Hz, which translates to 1000 data transmissions per second to the computer.
How to change the DPI settings on the CyberPowerPC mouse
- Find the DPI switch on the mouse and click it. This button may often be found on either the top or side of the mouse.
- Maintaining pressure on the DPI switch is required. You will be able to go back and forth between the various DPI settings with this.
- Once you have reached the desired level, you may let go of the DPI switch. The current DPI setting will be shown as an indicator by the mouse’s LED lights.
- Alternately, it’s possible that some kinds of CyberPowerPC mice come included with software that, when installed on your computer, enables you to change the DPI settings. You may get the software by downloading it from either the CyberPowerPC website or the website of the original manufacturer.
- After installing the program, you can open it and go to the DPI settings to make adjustments. You may change the DPI setting by dragging a bar or typing in the appropriate number for the DPI setting.
It is essential to keep in mind that some games could have their own sensitivity settings. Because of this, it is recommended that the DPI setting on the CyberPowerPC mouse and the sensitivity setting in the game should be adjusted in order to get the best possible results.
It is also a good idea to experiment with the DPI setting in a variety of games so that you can choose the sensitivity level that is optimal for your requirements. If you discover that the DPI setting is not optimal for your needs, you are free to change it at any time.
Recommended DPI settings for different types of games
It is possible for the suggested DPI settings for certain games to change based on the kind of game, as well as your own individual tastes. Nevertheless, the following are some generic rules that apply to the many sorts of games:
Games played from the first-person perspective are referred to as first-person shooters (FPS), and since these games need fast and accurate aiming, a higher DPI level is often preferred. In first-person shooter games, the default DPI level ranges from 1600 to 24000.
Real-time strategy (RTS) games: Since RTS games demand a balance between accuracy and speed, a DPI level that is somewhere in the middle is suggested. RTS games often use a DPI level ranging from 800 to 1200.
Since role-playing games (RPGs) are often less action-packed and more focused on exploration and interaction, a DPI setting that is lower than 100 is advised to play them. In RPGs, the default level is often between 400 and 800 DPI.
Games that require quick and precise movements, such as sports and racing games It is recommended that a higher DPI setting be used for games that require quick and precise movements. The use of a setting between 1600 and 24000 DPI is typical for games of this sort.
MMO and MOBA games: Because of the need for rapid and accurate aiming as well as a broad field of view in MMO and MOBA games, it is recommended to use a DPI setting that is between medium and high. In MMOs and MOBAs, the default setting is typically between 800 and 1600 DPI.
It is essential to keep in mind that the recommendations presented here are of a general nature, and that the optimal DPI setting for you may differ depending on your individual preferences as well as the way you play the game. It is always a good idea to test out a variety of different DPI settings within the games that you play to determine which one is the most effective and comfortable for you to use.
How to test and fine-tune your DPI settings for optimal performance
If you’re a PC gamer, you’ve probably been hearing about DPI (dots per inch) settings for a while now. You may have even tried to adjust them yourself, but if you’ve gotten stuck at the same point, then it’s time for some help.
DPI stands for dots per inch and refers to how many pixels make up an area of your screen (or monitor). The higher the DPI setting, the more pixels can fit into one square inch of screen real estate. As a result, games look sharper and more detailed and they also run smoother because there are fewer pixels to move around as you play them.
But there’s more than just aesthetics at stake here: if you set your DPI too high or too low, everything in-game will look blurry until you fix it. And even when it looks perfect on paper (or whatever), there may be other problems with performance that will make things less enjoyable overall–so it’s important to test out different settings before committing to one particular option.
Common DPI-related issues and how to troubleshoot them
DPI-related issues are a common problem for businesses. They can be difficult to troubleshoot, but there are some basic steps you can take to get your DPI back up and running.
The first step is to make sure that the issue isn’t related to your network or other devices in your environment. If you’re using a Wi-Fi router and it’s not working properly, then chances are that the problem is with that router itself.
If you’re using a wired connection, however, there may be another device in your network that’s causing the problem.
The second step is to check whether or not any other programs are using too much bandwidth on your computer or network. Some programs may cause conflicts with other applications running on your computer; others may use more resources than they should due to their design.
You can use third party tools to identify these kinds of problems quickly and easily so that they can be fixed immediately.
Conclusion
In conclusion, adjusting the CyberPowerPC mouse DPI settings is a simple and effective way to enhance your gaming precision and control. By following the step-by-step guide provided in this article, you can easily customize your mouse’s sensitivity and optimize it for different genres of games. With the right DPI settings, you’ll be able to improve your gaming performance and enjoy a more immersive gaming experience.
We’ve covered the basics of how to get the most out of your CyberPowerPC mouse’s DPI settings. If you’re looking to improve your gaming performance or just want to make sure that your mouse is working at its best, then this is a good place to start.
But don’t stop there. We’ve also included some tips and tricks that can help you make the most of your experience with this particular model.
If possible, try playing with different DPI settings until you find one that works for you–you might find one that works better than another one if you change something about how fast or slow your cursor moves when you click on something.
Understanding the importance of DPI and its impact on gaming performance is crucial. By increasing or decreasing the DPI, you can adjust the mouse sensitivity according to your preference. This allows for better accuracy and control in games, giving you an edge over your opponents.
Additionally, troubleshooting common DPI adjustment issues ensures a smooth experience. If you encounter problems such as unresponsive buttons, software conflicts, or incorrect DPI readings, refer to the troubleshooting section in this article to find solutions. This will help you resolve any issues that may arise during the DPI adjustment process, allowing you to fully optimize your CyberPowerPC mouse.
With the combination of proper customization, troubleshooting, and the right DPI settings, you can unleash the full potential of your CyberPowerPC mouse and take your gaming to new heights. So don’t wait, start adjusting your DPI settings today and experience the difference in gaming precision and control.
FAQ
What is DPI and why is it important for gaming?
DPI, or dots per inch, is a measurement of sensitivity for your mouse. It directly impacts precision and accuracy in games, allowing for improved control and gameplay.
How do I identify my current DPI settings on my CyberPowerPC mouse?
You can refer to the manual that came with your mouse, perform an online search using the make and model, or use the built-in software or buttons on your mouse to check and change your DPI settings.
How do I adjust the DPI settings on my CyberPowerPC mouse?
You can change the DPI settings using the buttons on your mouse or through the software provided by CyberPowerPC. Finding the right balance between speed and precision is important for enhanced control.
What are the recommended DPI settings for different genres of games?
Recommended DPI settings vary based on the genre of the game. For MOBA games, an average DPI range of 800-1200 is recommended. For FPS/Shooter games, a DPI range of 400-800 is common. Real-time strategy games may benefit from a DPI range of 1000-1600, while MMO/RPG games may require a range of 1600-2400 DPI.
What are some common DPI adjustment issues and how can I troubleshoot them?
Common issues include unresponsive buttons, software conflicts, and incorrect DPI readings. You can troubleshoot these issues by checking for firmware updates, reinstalling the mouse software, or adjusting the DPI settings in the software or through the buttons on your mouse.
A blog which focuses on business, Networth, Technology, Entrepreneurship, Self Improvement, Celebrities, Top Lists, Travelling, Health, and lifestyle. A source that provides you with each and every top piece of information about the world. We cover various different topics.


Fire whirl observed above volatile fire near Chico’s Park
Amidst the state’s largest wildfire of the year doubling in size Thursday evening, a spectacular and frightening sight unfolded above...
Arsonists with Inside Knowledge Targeted Paris Railways to Cause Chaos
In a shocking act of sabotage, suspected arsonists struck the Paris railways in a deliberate attempt to heighten chaos and...


Japanese activists suggest that the mysterious skulls and skeletons uncovered 35 years ago may be connected to infamous war crimes
35 years ago, a shocking discovery was made in Tokyo that raised questions about Japan’s dark wartime history. Dozens of...


How Do Hot Jupiters Form?
When we think of Jupiter-type planets, we usually picture massive cloud-covered worlds orbiting far from their stars. That distance keeps...


Vince Vaughn Purchases Professional Pickleball Team in Southern California: Meet the Scorpions
Actor Vince Vaughn has recently made headlines by purchasing a majority ownership stake in the National Pickleball League’s Coachella Valley...
Inspector General Criticizes Barr’s Involvement in Election Probe
The Department of Justice’s watchdog recently criticized the role of former Attorney General William Barr in an election inquiry that...


Astronauts on the Station can now enjoy 4K streaming video viewing
High definition streaming has become a norm in our daily lives, but astronauts aboard the Space Station have had to...


Jennifer Lopez expresses gratitude to fans for birthday messages: ‘Feeling completely overwhelmed’
Jennifer Lopez celebrated her 55th birthday on Wednesday, July 24, and later thanked her fans for their wishes in a...


L.A. Zoo sees successful rearing of 17 condor chicks
A groundbreaking method of rearing California condors at the Los Angeles Zoo has resulted in a remarkable 17 chicks hatching...
“Three Seconds to React”: Boater Shares Experience of Whale Capsizing His Vessel
On a calm summer day in New Hampshire, two boaters found themselves in a harrowing situation that few have experienced...
Fire whirl observed above volatile fire near Chico’s Park
Arsonists with Inside Knowledge Targeted Paris Railways to Cause Chaos
Japanese activists suggest that the mysterious skulls and skeletons uncovered 35 years ago may be connected to infamous war crimes
How Do Hot Jupiters Form?
Vince Vaughn Purchases Professional Pickleball Team in Southern California: Meet the Scorpions

Breaking News: The Annual Juneteenth Celebration of Basketball Tournament Festival Set to Make History in Inglewood, CA

Trump and Biden clash over immigration and border issues in presidential debate

Tom Cruise joins forces with Glen Powell at ‘Twisters’ premiere in London

Report states that Brad Pitt has minimal communication with his adult children

Prosecutor Claims Senator Menendez ‘Abused His Office for Personal Gain’
Fire whirl observed above volatile fire near Chico’s Park
Arsonists with Inside Knowledge Targeted Paris Railways to Cause Chaos
Japanese activists suggest that the mysterious skulls and skeletons uncovered 35 years ago may be connected to infamous war crimes
How Do Hot Jupiters Form?
Vince Vaughn Purchases Professional Pickleball Team in Southern California: Meet the Scorpions
-
 Entertainment2 weeks ago
Breaking News: The Annual Juneteenth Celebration of Basketball Tournament Festival Set to Make History in Inglewood, CA
-
 Entertainment3 weeks ago
Tom Cruise joins forces with Glen Powell at ‘Twisters’ premiere in London
-
 Entertainment2 weeks ago
Report states that Brad Pitt has minimal communication with his adult children
-
 News3 weeks ago
Prosecutor Claims Senator Menendez ‘Abused His Office for Personal Gain’
-
News2 weeks ago
Is Biden’s Presidency Facing a Turning Point?
-

 Business2 weeks ago
Determining Rental Property Value: Guide for Landlords
-

 News2 weeks ago
Blaze in San Bernardino National Forest Burns Through 2,700+ Acres
-

 Entertainment2 weeks ago
New documentary hints at Abraham Lincoln’s hidden homosexual relationships
